


NeoCM
-
Postów
7 683 -
Dołączył
-
Ostatnia wizyta
-
Wygrane w rankingu
288
Odpowiedzi opublikowane przez NeoCM
-
-
Z opisu wynika, że jest potrzebny.
Sęk w tym, że najnowszy system jest nieco lepiej zabezpieczony, widać to po nowych nexusach, gdzie trzeba "ujawnić" partycję data. Bo aktualizacja do 6.0 w tych modelach ukrywa tą partycje. W przypadku G2 chodzi o podmianę pliku aboot, który poprawie obsługuje romy oparte na Android M. Dlatego zaleca się instalacje tego hybrydowego botsa. Mówiąc prościej, suport G2 kończy się na KK i nie bardzo on obsługuje systemy oparte na android 6.0.
Więc jeżeli chcesz dobrze działający rom, to wgraj ten plik przez instalacją romu RR. A jest to plik zip, więc instalacja odbywa się tak samo jak przy instalacji romu. -
A próbowałeś go zmienić na nazwę boot.img zamiast twrp ?
-
Jak nie masz systemu, to nic nie zrobisz.
Możesz próbować wgrać rom przez fastboot-a.
-
Sterowniki masz wgrane?
Możesz dać screen operacji?
-
Witaj, temat został poprawiony zgodnie z regulaminem. Następnym razem tworząc temat zapoznaj się z tematem Jak zakładać temat.
-
 1
1
-
-
Telefon z USA będzie miał problemy z sieci.
Może nawet posiadać simlocka.
-
[Huawei Mate 8]SRK Tool Huawei Bootloader/ROOT/Recovery/Backup/Utility - all in one
Proste narzędzie, które za nas zrobi pewne operacje.. czyli zdejmie bootloader, zrootuje urządzenie, wgra nawet custom recovery...
Wymagania:
- Debugowanie USB
- Sterowniki USB
- Kabel USB
Lista zmian w programie/ co dziala i co dodano:
SpoilerSTABLE 1.2 - 20160609
- Add Utility Changing build.prop parameter ro.build.display.id, Comfortable to debrand
- Add Utility Reboot system
STABLE 1.1 - 20160605
- Fixed a little bug for root
- Add Install Recovery 6.0 , Support EMUI 4.1 - Mate 8
STABLE 1.0 - 20160521
- Fixed Root and support only Mate7,8,Honor6,6+,7,7+,P9
- Fixed Backup oeminfo
- Add TWRP for Honor7,7+
- Add Utility Bootloader status checking
- Add Utility Reboot to erecovery
- Add Utility dumpsys deviceidle disable (Disable Doze)
- Add Utility dumpsys deviceidle enable (Enable Doze)
- Add Utility Changing oeminfo and custom.bin (Huawei Mate8)
- Add Utility Changing oeminfo and custom.bin (Huawei Mate7)
- Add Restore oeminfo and custom.bin(Can apply for install oeminfo and custom.bin
for all Huawei Phone)
- Optimize size of tool
Beta 04.10 - 20160507
- Add install TWRP Huawei P9
Beta 04 - 20160507
- Fixed Root
- change backup oeminfo.img to oeminfo
Beta 03 - 20160504
- Add root support All huawei phone
- Add install TWRP honor6+
- Add backup oeminfo/custom.bin
- Add Utility/List all partition in huawei device
Beta 02 - 20160501
- Add How to enable USB Debugging
- Add Huawei Driver (Install Hisute)
- Add Install Recovery for Mate7,Mate8 Stock and TWRP Recovery for Marshmallow
Beta 01 - 20160429
- initial version
- Unlock bootloader
- Relock bootloader
- Utility
1. Exit FASTBOOT AND RESCUE MODE
2. Reboot to Recovery
3. Reboot to BootloaderInstrukcja:
- Pobieramy program
- Wypakowujemy
- Podpinamy urządzenie do portu USB
- Wybieramy interesujące nas opcje.
Pobierz:
https://www.androidfilehost.com/?fid=23991606952598964
xda: http://forum.xda-developers.com/lg-g2/development/tools-srk-tool-useful-toos-lg-root-twrp-t3079076
-
1
-
[Huawei Mate 7]SRK Tool Huawei Bootloader/ROOT/Recovery/Backup/Utility - all in one
Proste narzędzie, które za nas zrobi pewne operacje.. czyli zdejmie bootloader, zrootuje urządzenie, wgra nawet custom recovery...
Wymagania:
- Debugowanie USB
- Sterowniki USB
- Kabel USB
Lista zmian w programie/ co dziala i co dodano:
SpoilerSTABLE 1.2 - 20160609
- Add Utility Changing build.prop parameter ro.build.display.id, Comfortable to debrand
- Add Utility Reboot system
STABLE 1.1 - 20160605
- Fixed a little bug for root
- Add Install Recovery 6.0 , Support EMUI 4.1 - Mate 8
STABLE 1.0 - 20160521
- Fixed Root and support only Mate7,8,Honor6,6+,7,7+,P9
- Fixed Backup oeminfo
- Add TWRP for Honor7,7+
- Add Utility Bootloader status checking
- Add Utility Reboot to erecovery
- Add Utility dumpsys deviceidle disable (Disable Doze)
- Add Utility dumpsys deviceidle enable (Enable Doze)
- Add Utility Changing oeminfo and custom.bin (Huawei Mate8)
- Add Utility Changing oeminfo and custom.bin (Huawei Mate7)
- Add Restore oeminfo and custom.bin(Can apply for install oeminfo and custom.bin
for all Huawei Phone)
- Optimize size of tool
Beta 04.10 - 20160507
- Add install TWRP Huawei P9
Beta 04 - 20160507
- Fixed Root
- change backup oeminfo.img to oeminfo
Beta 03 - 20160504
- Add root support All huawei phone
- Add install TWRP honor6+
- Add backup oeminfo/custom.bin
- Add Utility/List all partition in huawei device
Beta 02 - 20160501
- Add How to enable USB Debugging
- Add Huawei Driver (Install Hisute)
- Add Install Recovery for Mate7,Mate8 Stock and TWRP Recovery for Marshmallow
Beta 01 - 20160429
- initial version
- Unlock bootloader
- Relock bootloader
- Utility
1. Exit FASTBOOT AND RESCUE MODE
2. Reboot to Recovery
3. Reboot to BootloaderInstrukcja:
- Pobieramy program
- Wypakowujemy
- Podpinamy urządzenie do portu USB
- Wybieramy interesujące nas opcje.
Pobierz:
https://www.androidfilehost.com/?fid=23991606952598964
xda: http://forum.xda-developers.com/lg-g2/development/tools-srk-tool-useful-toos-lg-root-twrp-t3079076
-
1
-
[Galaxy Alpha] <MM 6.0.1> ResurrectionRemix

Rom dla posiadaczy Galaxy Alpha oparty głównie na cynogenmodzie.
Romy bardzo dobrze działają i mają mało błędów.Lista zmian:
SpoilerFeatures:- Based On Latest Google Android 6.0.1 Release Based On Cyanogenmod 13 Sources RR Customizations:- -Navigation Bar -Enable/Disable Navbar -Navbar Button Customization -Navbar Slim Dim
-Animate Dim -Dim Timeout Duration -Dim Alpha -Double Tap To sleep navbar -Navigation Bar left/Right handed mode Switch for landscape
-Statusbar -Brightness Slider -Enable/Disable Show Notification Count -SuperUser Indicator Switch -Double Tap To sleep Statusbar -Carrier Label
-Carrier Label Switch -Carrier label Colour -Carrier Label Size -Clock Customizations -Time & date -Clock Colour -Day & date Toogle -Center/Right/Left Clock Choice -Date Format -Clock Font Styles -Battery -Battery Bar customization -Battery Icon Customization(circle/landscape/Potrait and more) -Battery % Text -Network Traffic Indicator -Network Traffic Arrows Switch -Incoming/OutGoing Traffic -Network traffic Color -Statusbar RR Logo -RR logo Color -StatusBar Weather -Weather Color -Weather Position(left/right) -Weather Style -Weather Size
-Animations -Toast Animations -ListView Animations -System Animations
-Gestures -Gestures Anywhere Feature -3 Finger Swipe Screenshot Gesture
-App Circle Bar -Choose apps in AppSidebar -Trigger Width -Trigger Hieght -Trigger Position -App Sidebar -Choose apps in App circle -Trigger Width -Trigger Hieght -Trigger Position -Pie -Pie Trigger(left ,Right ,Bottom) -Pie Targets -Pie Colors -More Pie Features
-Recents Panel -Clear All button Switch -Clear All Tasks Switch -Clear All Button Location(Top right,Top Left,Top Center,Bottom Left,Bottom Right,Bottom Center) -Recents Search Bar -Full Screen Recents -Slim Recents -OmniSwitch
-Cclock Widget -CLock And Alarm Customizations -Weather Panel Customizations -Calender Events
-LockScreen -Lockscreen Bottom Shortcuts -Lockscreen General Shorcuts -100+ Icons for Shortcuts -Double Tap to Sleep Lockscreen -Lockscreen Media Art/Enable Disable -Quick PIN/Patter Unlock -LockScreen Blur -Lockscreen Blur Intensity -LockScreen Wallpaper -Lockscreen Weather Widget -Lockscreen Icons Color
-Quick Settings Draggable Tiles -Customizable Tiles -Show Two Main Tiles Per Row -Dyanamic Tiles Adjustment -Notification Drawer -Weather Display Switch -LongPress Toogles to Enter Settings -Disable Immersive Mode Messages -Force Expand Notification -Task Manager Switch -Time Contextual Header(HD,Modern,Poly) -Quick PullDown Switch
-Buttons -Backlight Timer -Backlight Strength
-Advanced Reboot Menu -Power Menu Customizations -Power Off -Reboot(Recovery, Bootloader, Hot Reboot) -ScreenShot -Power Menu End Calls Switch -Restart SystemUI -Airplane Mode -ScreenRecord -On the Go Mode -Sound Panel
-Home Button(For devices with HW keys Only) -Home Button answer call -Long Press Actions -Double Tap Actions
-Menu Button(For devices with HW keys Only) -Short Press Actions -Long Press Actions
-Search Button(If Device Supports) -Short Press Action -Long Press Action
-Volume Buttons -Wake Up Device -Playback Control -Ringtone Volume Control -Keyboard Cursor Control -Swap Buttons on Landscape mode -Volume Key Answer
-Miscellaneous -Selinux Switch (Switch Between Permissive and Enforcing Selinux if Device has Selinux Enabled) -cLock Shortcut -Disable Battery Saver Warning Color -Disable Fc Notifications -Wakelock Blocker -Media Scanner On Boot Behaviour -Cammera Shutter Sound Enable/Disable
-SystemUI Tuner -Enabled By default -Removed Demo mode and Tweaked SystemUI Tuner As compared To AOSP -StatusBar Icons Cuzomizations -Quick Settings Customizations
Other Features -Perfomance Profiles -LCD Density -Expanded Desktop Mode -Audio FX -Heads Up Switch -Live Display -Configurable 0,90,180,270 Degree Rotation -Lock Screen Autorotate Switch -Native Tap to Wake From Marshmallow -Double Tap Power Button To enable Camera gesture -Prevent Accidental Wakeup -Wake Phone on Charging Plug -Battery Light Customizations -Notification Light Customizations -Font Size -CM privacy guard -Performance Tweaks(Kernel Aduitor Inbuilt)
-SuperSU Inbuilt
-RR OTA -Optimized With UBER TC for smoother ,Snappier and Battery Friendly Performance -CM Theme Chooser -OverAll Smoothness Improvements -Optimizations to Improve Battery -Includes All Android Marhsmallow Features -Includes ALL CM13 Features -AND MUCH MUCH MOREWymagania:
- ROOT
- TWRP najnowsze https://www.androidfilehost.com/?fid=24415232478676110
Instrukcja:
- Pobierz ROM i Gapps
- Wrzuć pliki na kartę pamięci/ p. urządzenia
- Wyłącz telefon
- Uruchom tryb recovery
- Wykonaj pełne WIPE
- Następnie zainstaluj ROM, później Gapps
- Reboot
Pobierz:
oficjalny ROM: https://basketbuild.com/devs/resurrectionremix/slte
Gapps: http://opengapps.org/
xda: http://forum.xda-developers.com/galaxy-alpha/development/rom-resurrectionremix-v5-6-0-t3277521
-
1
-
[Galaxy Note 5] TWRP Recovery -oficjalne
Nieoficjalne Recovery dla Samsung Galaxy Note 5
Wymagania:
- Wgrane sterowniki USB
- Włączony tryb debugowania USB
- ROOT
Instrukcja:
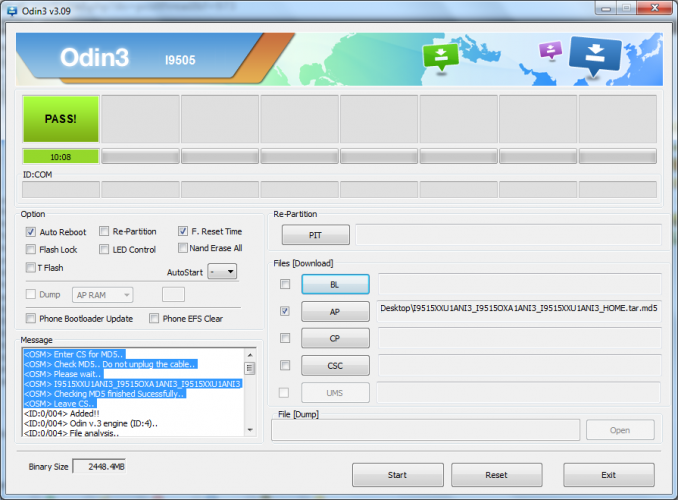
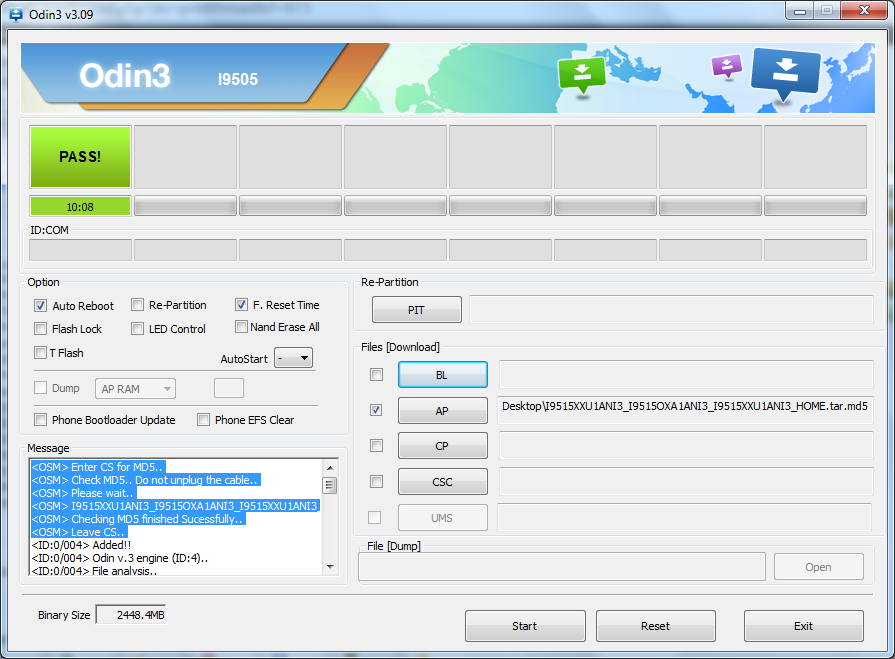
- Instalacja poprzez program ODIN
-
Pobierz program ODIN
Odin_3.10.7.zip - Pobierz TWRP Recovery w formacie tar.md5
- https://dl.twrp.me/noblelte/
- Odpal program ODIN
- Umieść plik w Oknie AP
-
Odaznacz re-partiiton
- Wyłącz telefon
-
Uruchom go w trybie DOWNLAOD
HOME, POWER i Volume Down - Podłącz telefon pod port USB
- Jeżeli odin wskaże połączenie kliknij START
- Po wgraniu sprawdź czy masz wgrane TWRP Recovery
xda: http://forum.xda-developers.com/note5/orig-development/twrp-2-8-7-0-official-t3195262
-
1
-
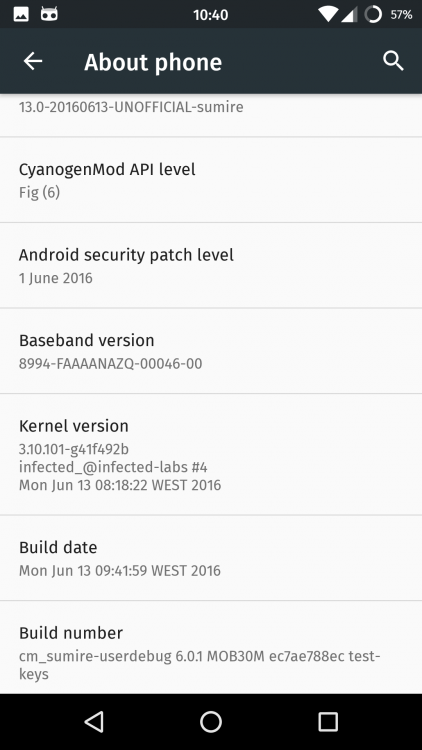
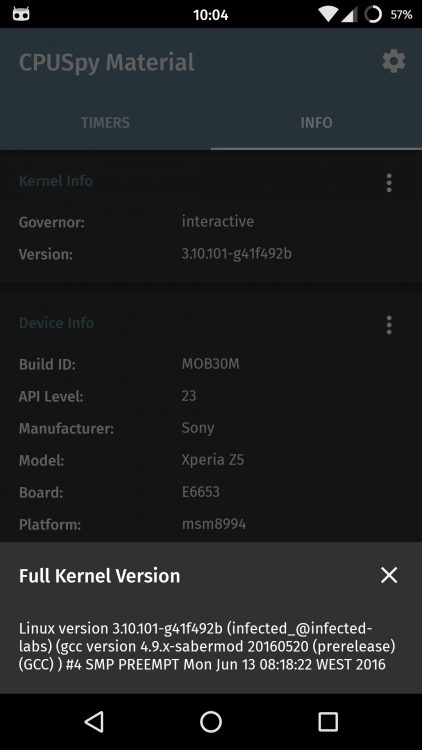
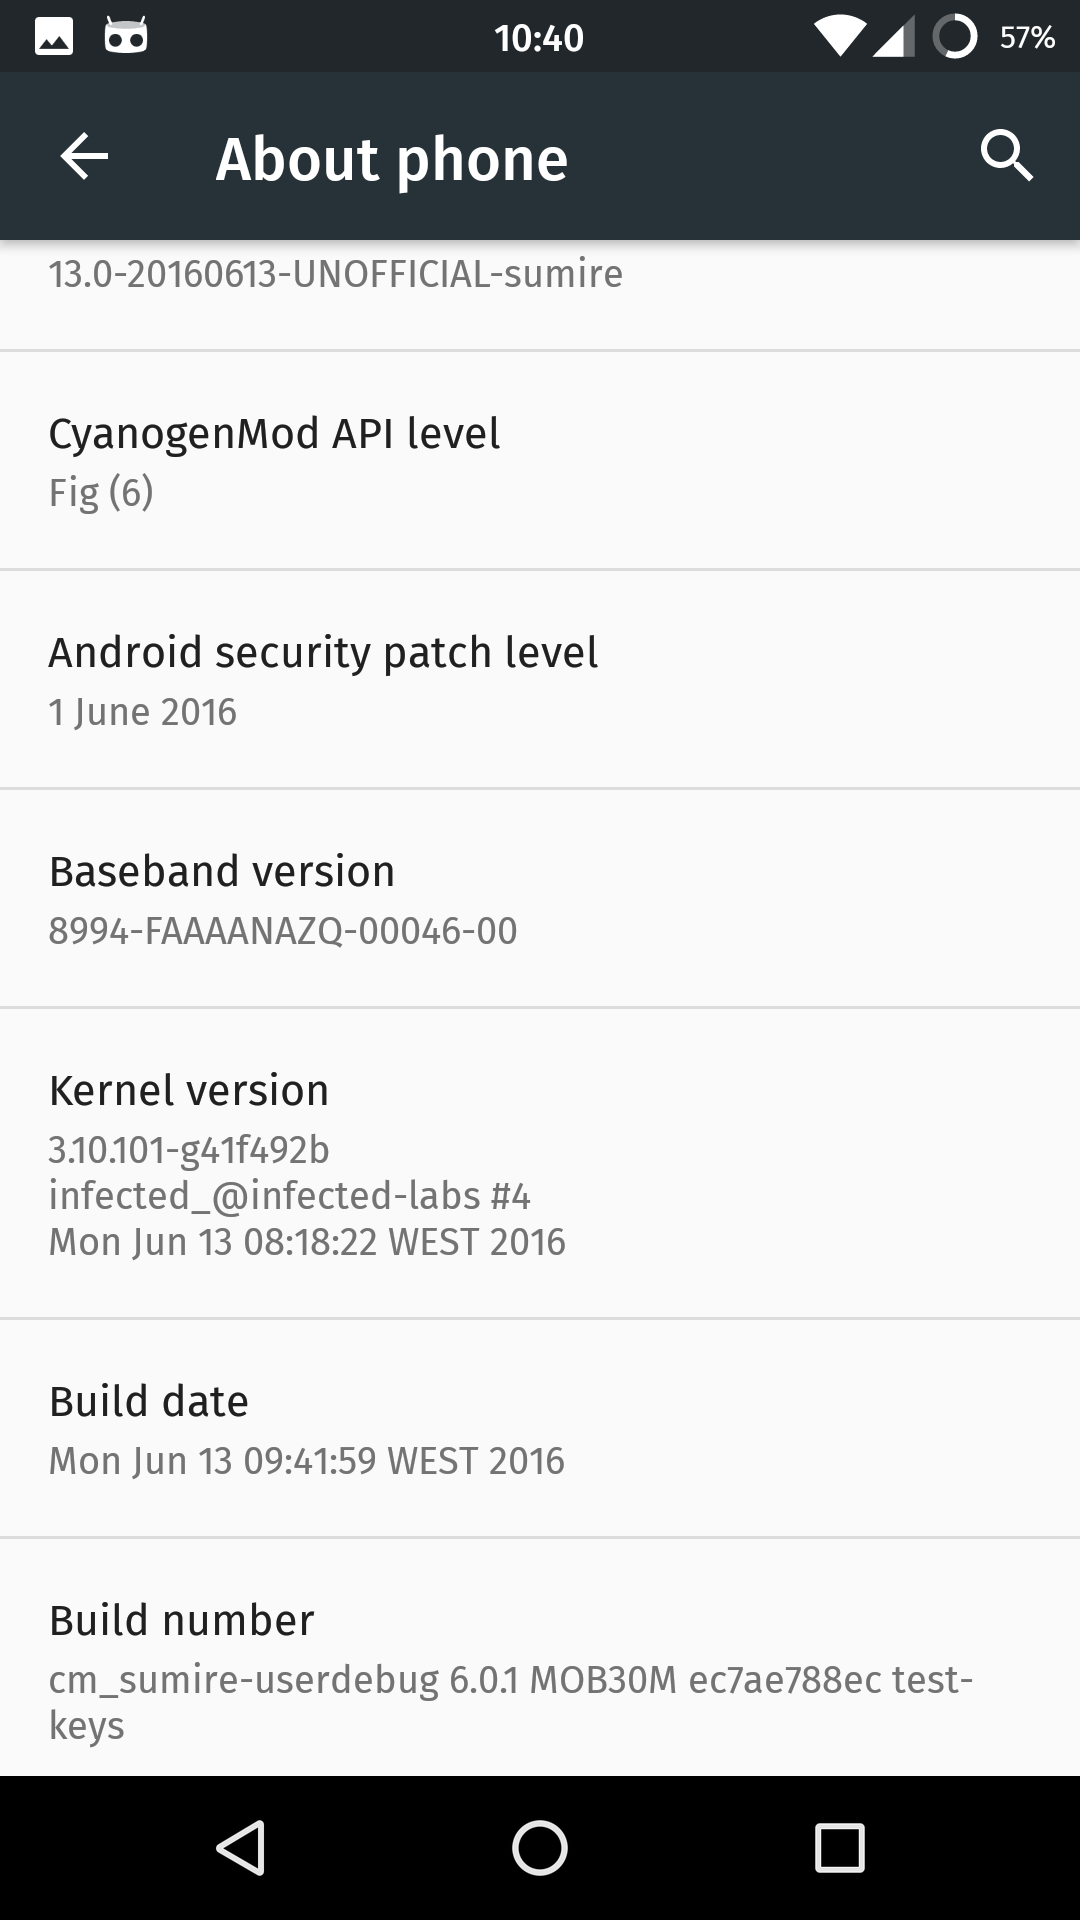
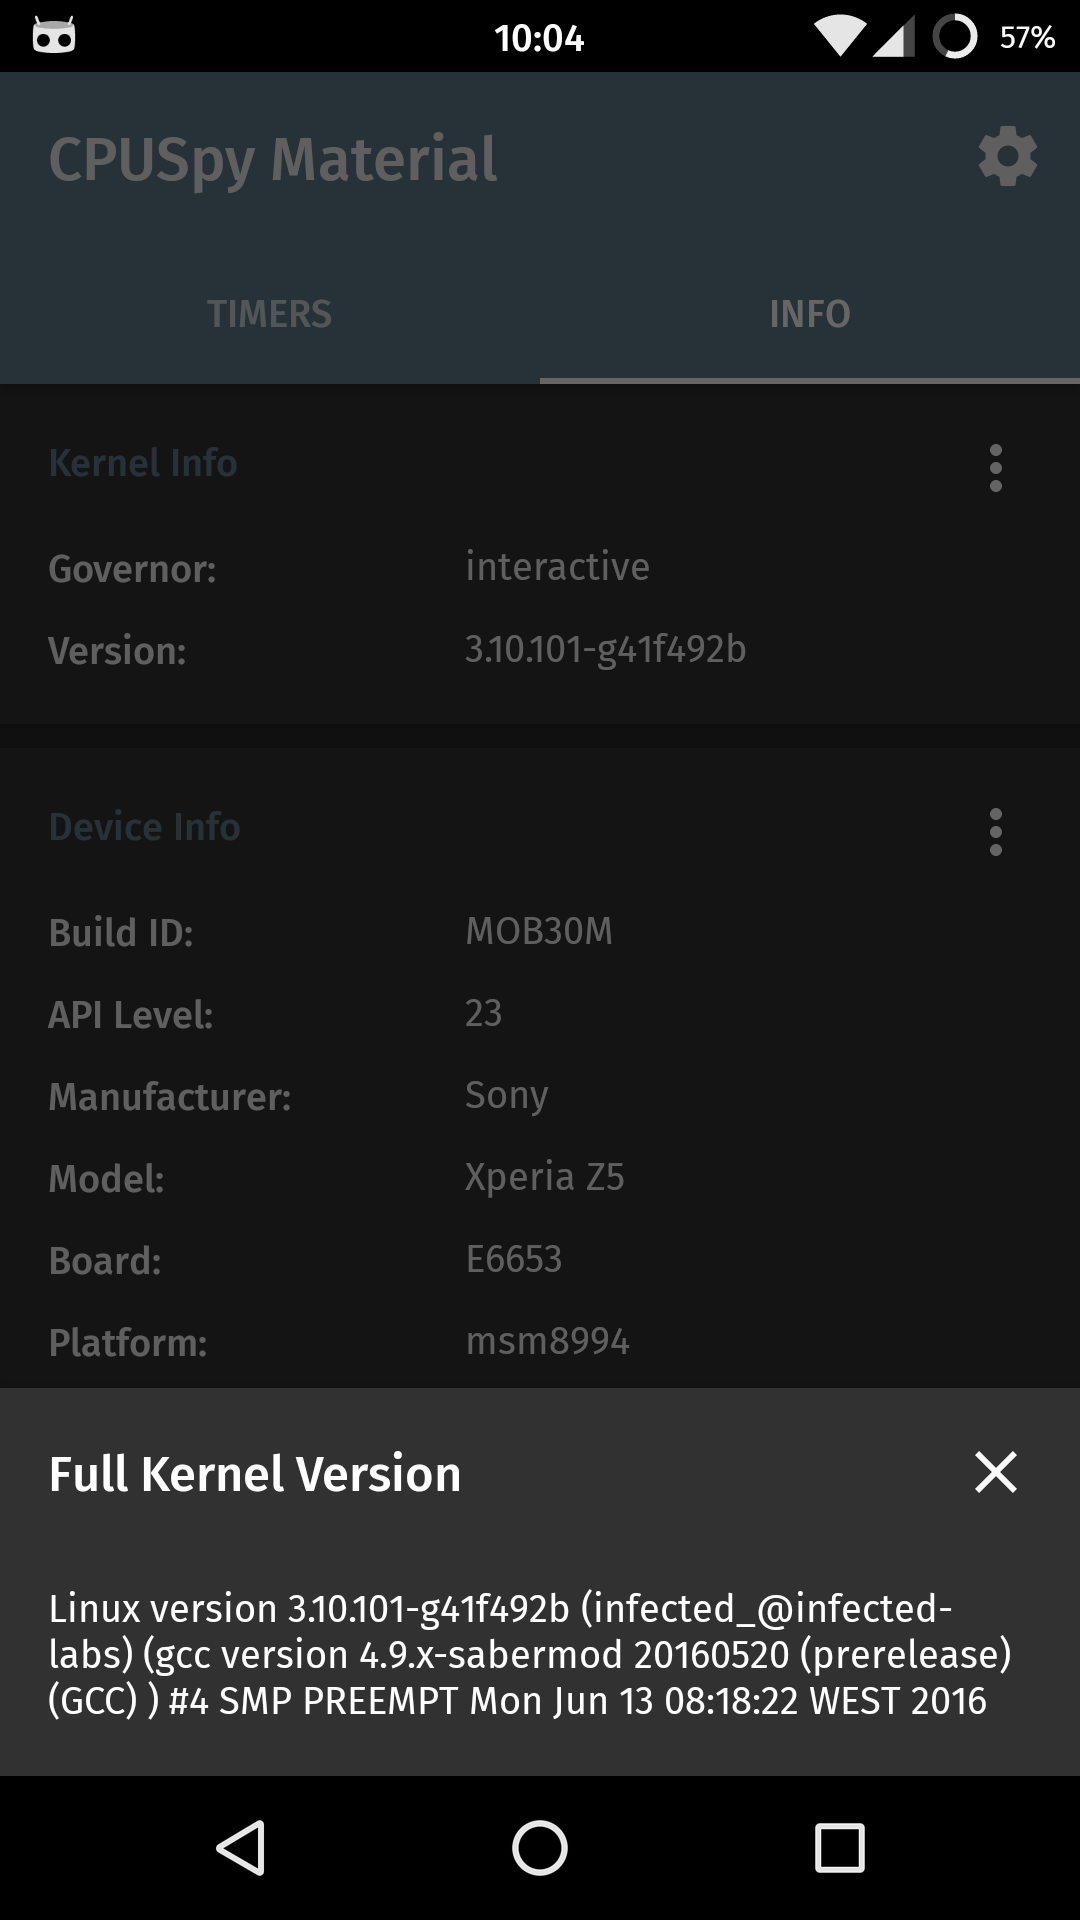
[Xperia Z5] CyanogenMod 13 SaberMod Builds

Jest to nieoficjalna wersja CM 13, wzbogacana o funkcje przez SaberMod-a.
Wymagania:
- Blankowany bootloader
- ROOT
- TWRP
Instalacja:
- Najlepiej jest wgrać stocka, potem wykonać roota i odblokować bootloader-a
- Pobierz TWRP i wgraj : http://www.infectedbuilds.net/downloads/sumire/aosp_mm/twrp_recovery/
-
Wgraj je poprzez fastboot-a
fastboot flash twrp_recovery_20160607.img - Następnie pobierz ROM z CM
- Wyodrębnij z niego plik boot.img
- Pobierz też Gapps
- Wejdź w TWRP
- Wykonaj pełne wipe
- Zainstaluj ROM, potem gapps
- Potem wgraj plik boot.img
- Koniec
Pobierz:
ROM: http://www.infectedbuilds.net/downloads/sumire/cm_13.0/
Gapps: http://forum.xda-developers.com/android/software/app-minimal-gapps-gapps-lp-20150107-1-t2997368xda: http://forum.xda-developers.com/xperia-z5/development/rom-cyanogenmod-13-0-sabermod-builds-t3397743
-
1
-
co znalazłem, to Ci wstawiłem.
Pro po CM-a masz oficjalnego z linka, więc kamera powinna działać.
-
A zamierzasz wgrać custom roma?
Z TWRP możesz mieć problem, czasami trzeba dograć "modem"- czyli zmodyfikowany plik, który pozwala na wgranie root-a.
Musisz zwracać na to uwagę. Ale lepiej by było jakbyś wgrał starszy system, lecz tu też jest niebezpieczeństwo. Czy nie masz nowszego boot-a. Bo czasami nowszy blokował możliwość wgrania niższej wersji systemu. W tych topowych modelach Samsung trochę namieszał.
-
1
-
-
Taką opcje będzie miało TWRP. - Te nie ma na pewno co masz.
-
Była kiedyś jakaś modyfikacja aplikacji, która pozwalała połączyć telefon z tym Gearem.
Aktualnie nie wiem jak to wygląda.
-
1.
2.
To musisz wykonać, aby wgrać sobie CM
-
Za szybko wychodzą te nowe wersje. Teamy nie mogą zdążyć łatać błędów... A te nowsze wersje wypuszczane przez Google też nie są doskonałe.
Za dużo w nich dupereli.. żeby rom ważył 500 MB? Kiedyś był max 100 MB-
1
-
-
Ja np na Note 3 nie mogłem dopasować dobrego romu. I żaden mi nie leżał, żarł baterię itp.
A na Note 2, każdy custom rom dobrze się sprawował. I do dziś nie wiem od czego to zależy.. od lepszych kucharzy romów?
-
1
-
-
Ręczna aktualizacja rozwiąże problem kolego.
-
A przywrócenie stocka nic nie daje?
-
A co dokładnie potrzebujesz za informacje?
-
Pokaż screena.
Kabel USB masz samsunga?
Kies nie jest włączony?
Debugowanie USB też masz włączony?
-
A skąd masz takie informacje, iż nie da się zrobić ?
") Do zmiany romu potrzebny jest tylko TWRP (niekoniecznie root)
Do zmiany romu potrzebny jest tylko TWRP (niekoniecznie root)
-
Kolego jak widzisz.. czasami custom rom to jakiś kompromis pomiędzy funkcjami.
Snapchat poprzez ochronę danych wymaga systemu bez uprawnień root-a. Stąd te problemy z używaniem.
-
1
-
[LG G2 mini][D620]Partition Table Tool - zwiększ pamięć
w Poradniki, Romy i Mody
Opublikowano
A ten plik jest w tym folderze, gdzie odpalasz fastboota? (okno CMD)? Bo telefon znajduje, wiec innej opcji nie widzę.